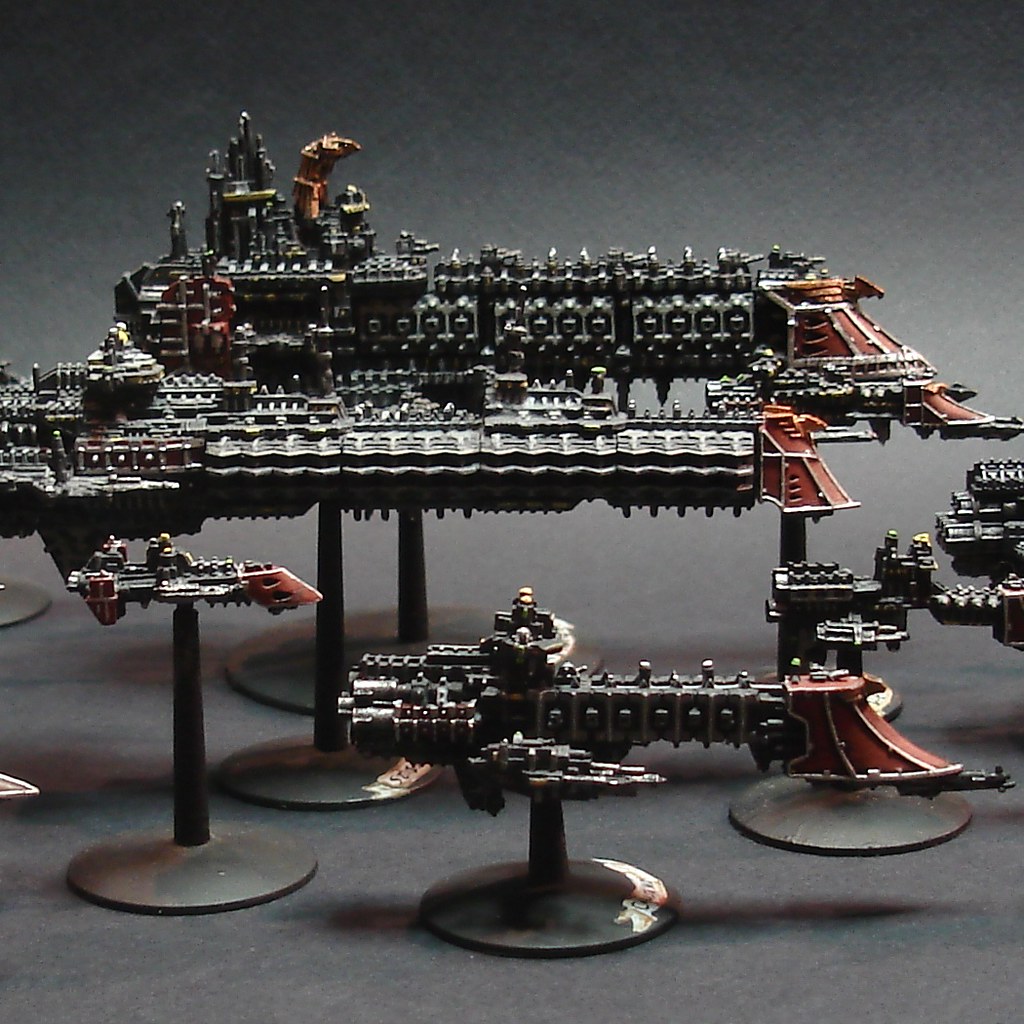
It's very exciting to have finally assembled the painted parts. It looks great and is really coming together now!
After soliciting some advice from some mates who use similar techniques over on WargamerAU, I was introduced to Tamiya XF-86 Flat Clear. I specifically wanted a clear that I could spray through my airbrush, as the Tamiya TS-80 rattle cans are lacquer based and too thick of an application can cause damage to the underlying paint. I went down to Toyworld and grabbed from XF-86 and I have to say it's very impressive. You just thin it like any other Tamiya acrylic and it provides a nice matte surface.
So all the parts got a coat and I then painted up the various optic sensors, followed a coat of gloss on the optics only. I then used super glue and 5 minute 2-part epoxy to assemble everything (epoxy is preferred as there is no danger of white hazing created from the super glue fumes).
One thing I have come to notice is that I really was a little too heavy with the brown wash application. At the time it felt like I wanted a really strong contrast, but in hindsight a little more subtle would be been better. In any case it's too late now - everything is sealed with the matte clear coat!
Next up: dust effects!
ATTENTION: As of March 2017 the Resin Addict Forums are being wound down. New members are no longer being accepted. Read more about it here.
Resin Addict Forum
A place to talk about your addiction
Painting Log: The Fiddler Mech
Moderator: Wardens
33 posts
• Page 2 of 3 • 1, 2, 3
Re: Painting Log: The Fiddler Mech
![]() by mangozac » Tue May 21, 2013 9:54 pm
by mangozac » Tue May 21, 2013 9:54 pm
Oh yeah I can make that....
-

mangozac - Resin Addict Collaborator
- Posts: 4271
- Joined: Fri Oct 16, 2009 3:40 pm
- Location: QLD, Australia
Re: Painting Log: The Fiddler Mech
![]() by Commissar-Krad » Wed May 22, 2013 12:14 am
by Commissar-Krad » Wed May 22, 2013 12:14 am
Looks good to me, Zac. Really cool kit that looks even better painted up. Can't wait to see more done on it. I still have to pick up some gloss varnish for when I use the oil based weathering products. I have had good results without it but it seems to need more cleanup from what I have seen.
-
Commissar-Krad - User
- Posts: 137
- Joined: Thu Nov 15, 2012 10:26 am
- Location: Buffalo NY
Re: Painting Log: The Fiddler Mech
![]() by mangozac » Wed May 22, 2013 7:59 am
by mangozac » Wed May 22, 2013 7:59 am
Done properly the oil effects work really well and are quite easy. The problem is that when first learning it's easy to miss little things that make it not so easy :/
The AK-Interactive products are awesome though - for washes and stuff I'd definitely recommend them over just thinning oil paint from a tube!
The AK-Interactive products are awesome though - for washes and stuff I'd definitely recommend them over just thinning oil paint from a tube!
Oh yeah I can make that....
-
mangozac - Resin Addict Collaborator
- Posts: 4271
- Joined: Fri Oct 16, 2009 3:40 pm
- Location: QLD, Australia
Re: Painting Log: The Fiddler Mech
![]() by Commissar-Krad » Wed May 22, 2013 10:32 am
by Commissar-Krad » Wed May 22, 2013 10:32 am
Yeah I have a bunch of AK stuff now. On flat there's a bit of capillary action so I really need to get some gloss.
-
Commissar-Krad - User
- Posts: 137
- Joined: Thu Nov 15, 2012 10:26 am
- Location: Buffalo NY
Re: Painting Log: The Fiddler Mech
![]() by mangozac » Wed May 29, 2013 12:53 pm
by mangozac » Wed May 29, 2013 12:53 pm
Today's brief update is showing my progress on the diorama base. As you can see I'm going for a dirt street and section of sidewalk. The base is made from a piece of timer chopped to size and then edged with a styrene skirt. On top of this does a dirt mix and then the cement. I added too much black to the hydrostone "cement" mix so it's a little bit dark, but that's ok it will paint up to the right colour just fine.
Ignore the strange effect on the dirt - I had just applied some more (a dirt and PVA mixture) on top of the base dirt coat (which is dirt, hydrostone and a glob of PVA).
Here's the Fiddler sitting on top to show the scale. The next step is to scallop out slightly the spots where the feet will go, fill them with a sand and gel medium mix and then press the Fiddler into it to make it look "settled" into the ground (rather than hovering slightly above it). This thing would weigh a few tonnes so it would certainly put some pressure on the ground!
Once that's all done I'll paint the edging in gloss black, mask it off and then paint the dirt and cement.
Oh yeah I can make that....
-
mangozac - Resin Addict Collaborator
- Posts: 4271
- Joined: Fri Oct 16, 2009 3:40 pm
- Location: QLD, Australia
Re: Painting Log: The Fiddler Mech
![]() by factor40 » Wed May 29, 2013 10:10 pm
by factor40 » Wed May 29, 2013 10:10 pm
Looking really good, Zac. Splendid work!
-

factor40 - Habit
- Posts: 347
- Joined: Tue Apr 26, 2011 5:01 am
- Location: Arlington Heights, IL, USA
Re: Painting Log: The Fiddler Mech
![]() by mel_danes » Fri May 31, 2013 7:25 am
by mel_danes » Fri May 31, 2013 7:25 am
This thing is a beast.
Great work man.
Great work man.
-

mel_danes - Casual
- Posts: 26
- Joined: Mon Mar 19, 2012 12:13 pm
- Location: Grand Rapids, MI, USA
Re: Painting Log: The Fiddler Mech
![]() by mangozac » Fri May 31, 2013 8:23 am
by mangozac » Fri May 31, 2013 8:23 am
Thanks guys! I'm toying with the idea of making a mould for a jersey barrier so I can cast a couple in plaster and place on the diorama. It would be more work than is ideal though - maybe I'll just buy the Secret Weapon resin ones. The thing is I want them in plaster to give that nice texture that only plaster gives (and so damage and weathering looks realistic).
Oh yeah I can make that....
-
mangozac - Resin Addict Collaborator
- Posts: 4271
- Joined: Fri Oct 16, 2009 3:40 pm
- Location: QLD, Australia
Re: Painting Log: The Fiddler Mech
![]() by Commissar-Krad » Fri May 31, 2013 1:37 pm
by Commissar-Krad » Fri May 31, 2013 1:37 pm
Plaster is great for weathering....
-
Commissar-Krad - User
- Posts: 137
- Joined: Thu Nov 15, 2012 10:26 am
- Location: Buffalo NY
Re: Painting Log: The Fiddler Mech
![]() by mangozac » Mon Jun 10, 2013 6:58 pm
by mangozac » Mon Jun 10, 2013 6:58 pm
As with everything I do it took longer than planned, but the Fidder is finally completed!
I spent my long weekend finishing off the base so that I could do the pigment "dusting" to both the base and the model at the same time (to ensure the tones are correct). The base has turned out fantastically, especially after the pigments were added - they really pull everything together.
I'm very pleased with the concrete sidewalk on the base - I'll share the technique on an upcoming post for my Warhound diorama (that's next on the agenda). It was coloured by airbrushing with a custom Vallejo paint mix and then discolouration was applied using some oil and enamel paints. This step really makes the difference and makes it look like real, dirty concrete. A dark wash was applied to the joins between the slabs. I do have to note how much better these oil washes look than trying to achieve the same effects with acrylics. After the oils had dried I misted a light coat of Tamiya TS80 Flat Clear spray over the concrete to dull it down a bit.
But by far my favourite detail is the Coke can in the gutter. It was a last minute addition that came to me in a moment of inspiration. It's simply a piece of 2.5mm styrene rod with a crinkle pattern carved into one side. A small hole and a piece of microstrip make up the ring pull on one end. It was then primed and painted with Vallejo silver. The sides were given a coat of semitranslucent red (in order to retain some of the metallic sheen of the silver underneath) and finally "Coke" was painted on the side in white with my finest brush. It turned out fantastically and as my girlfriend pointed out it gives a really good reference of scale.
As I said above, it was the pigments dusting that really brought it all together. Despite the concrete looking dirty from the oil paint application, it needed to be covered in dirt to simulate the arid environment. In particular the gutter needed to be very dirty. I mixed up a nice colour using Secret Weapon Yellow Earth, Green Earth and Slate Grey pigments and applied it everywhere. It was deposited in heavy clumps in the gutter and then some Tamiya X20A thinners were dropped on top to settle it down. Once the thinners had evaporated I feathered it all out a bit and the result looks great.
All in all it's been a very satisfying project. As always I've learned a lot of lessons along the way! The biggest change that I think would have helped would be to add some warning sign and other aircraft style decals in a few spots. I just didn't have any handy when I was at that stage and didn't want to delay things waiting for some to arrive via mail order!
I do also have a 1/35 soldier figure to add to the base but the intention is to sculpt a futuristic looking helmet/visor system for him first. I'll get around to that one day and he can be added to the base then
On to the pics!
Oh yeah I can make that....
-
mangozac - Resin Addict Collaborator
- Posts: 4271
- Joined: Fri Oct 16, 2009 3:40 pm
- Location: QLD, Australia
Re: Painting Log: The Fiddler Mech
![]() by factor40 » Tue Jun 11, 2013 10:01 pm
by factor40 » Tue Jun 11, 2013 10:01 pm
Wow, Zac that's crazy good! The weathering, the details, just awesome. Have many of these models sold? It's been cool to see this project come from concept into fully realized model.
-Steve
-Steve
-
factor40 - Habit
- Posts: 347
- Joined: Tue Apr 26, 2011 5:01 am
- Location: Arlington Heights, IL, USA
Re: Painting Log: The Fiddler Mech
![]() by Blindhorizon » Wed Jun 12, 2013 3:50 am
by Blindhorizon » Wed Jun 12, 2013 3:50 am
Looks good man all that weathering and detail looks awesome, i like the crushed coke can in the gutter.
- Blindhorizon
- Habit
- Posts: 354
- Joined: Tue Jul 24, 2012 4:37 pm
Re: Painting Log: The Fiddler Mech
![]() by Vaaish » Thu Jun 13, 2013 4:46 am
by Vaaish » Thu Jun 13, 2013 4:46 am
Turned out nice, the coke can is a nice touch 
-Vaaish
- Vaaish
- Junkie
- Posts: 827
- Joined: Sat Oct 31, 2009 7:55 am
- Location: Greenville, SC
Re: Painting Log: The Fiddler Mech
![]() by mangozac » Thu Jun 13, 2013 8:04 am
by mangozac » Thu Jun 13, 2013 8:04 am
Thanks team! It's great to get these big projects finished off!
Oh yeah I can make that....
-
mangozac - Resin Addict Collaborator
- Posts: 4271
- Joined: Fri Oct 16, 2009 3:40 pm
- Location: QLD, Australia
33 posts
• Page 2 of 3 • 1, 2, 3
Who is online
Users browsing this forum: No registered users and 2 guests