Heyyas,
looks good, i'll redo the clay/placing later or tomorrow (its kinda night here in germany). Just 1 1/2 last questions ...
First: Is using drinking straws as material for the channels ok? As may be barely visible i used thick ones and thin ones where i thought either was more appropriate. I'm kind of at a loss what else to use ... after all i have no old filled channels from prior casting orgies ;P.
Also i was wondering ... some people seem to smear the clay up the master-pieces a bit, some just press it in ... what should i do in this paticular case? And why?
Thank you SO much yet again ;P Regards
- NebuK
ATTENTION: As of March 2017 the Resin Addict Forums are being wound down. New members are no longer being accepted. Read more about it here.
Resin Addict Forum
A place to talk about your addiction
New Addicts here for treatment
Moderator: Wardens
33 posts
• Page 2 of 3 • 1, 2, 3
Re: New Addict's here for treatment
![]() by NebuK » Sat Mar 31, 2012 5:56 am
by NebuK » Sat Mar 31, 2012 5:56 am
- NebuK
- Casual
- Posts: 17
- Joined: Tue Mar 20, 2012 7:41 am
Re: New Addict's here for treatment
![]() by paulson games » Sat Mar 31, 2012 7:52 am
by paulson games » Sat Mar 31, 2012 7:52 am
if you don't have the clay flush against the model it will leak in around the part, you can still cast it that way but you may need to cut the silicone smooth before makingthe second half.
Also you may want to try smoothing down the surface of the clay a bit to elminate the tool marks and jagged spots. When you have all sorts of bumps and points on the clay like that the silicone will duplicate that detail and it may make seating the two halves of the mold more difficult.
It doesn't have to be perfectly smooth, but if you can eliminate some of the rough spots it'll help the halves fit together easier. (and avoid flash)
-

paulson games - Resin Addict Collaborator
- Posts: 940
- Joined: Wed Oct 21, 2009 8:09 pm
Re: New Addicts here for treatment
![]() by mangozac » Sat Mar 31, 2012 9:26 am
by mangozac » Sat Mar 31, 2012 9:26 am
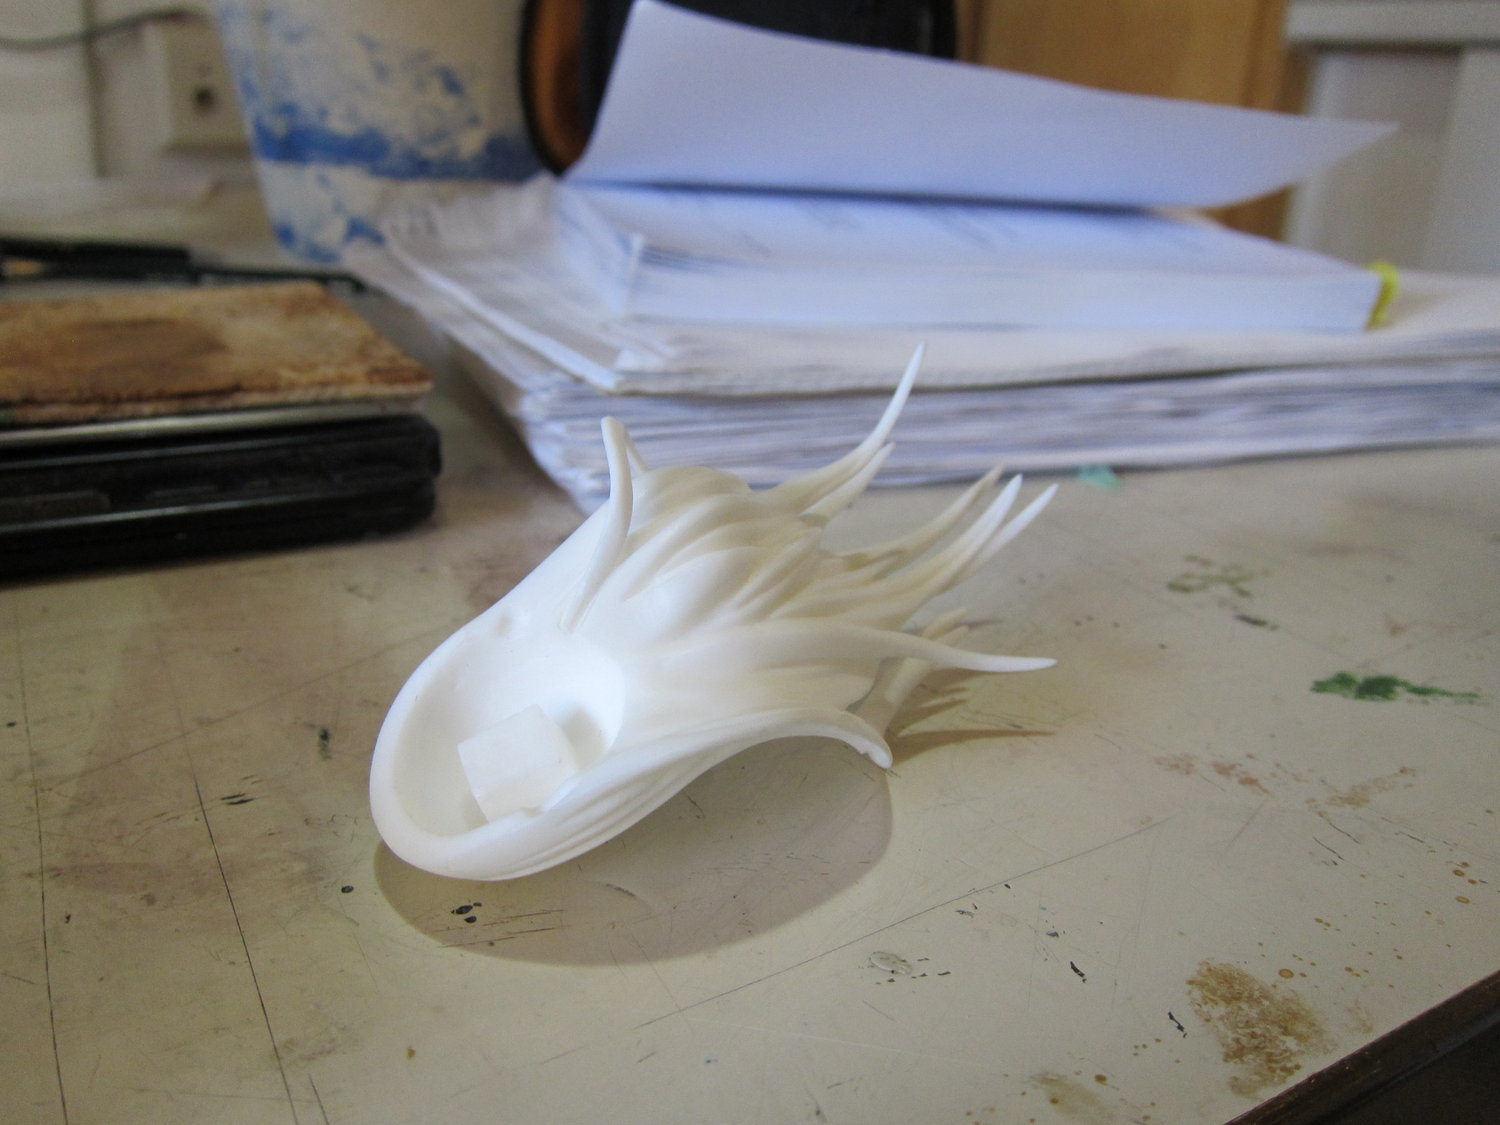
The trick with using the nuts as alignment keys I am familiar with, but I've never seen any of us using. When I was doing 2-part moulds to make keys you just use the non-brush end of a paintbrush to poke little impressions into the clay (rather than having the nuts sticking out of it).
I'm worried about those large curved areas on to of the head and stuff - they are very likely to accumulate tiny bubbles that sit on the surface and are a pain to clean up. Especially at the front of that square indentation.
I'm worried about those large curved areas on to of the head and stuff - they are very likely to accumulate tiny bubbles that sit on the surface and are a pain to clean up. Especially at the front of that square indentation.
Oh yeah I can make that....
-

mangozac - Resin Addict Collaborator
- Posts: 4271
- Joined: Fri Oct 16, 2009 3:40 pm
- Location: QLD, Australia
Re: New Addicts here for treatment
![]() by blind pig » Sat Mar 31, 2012 12:02 pm
by blind pig » Sat Mar 31, 2012 12:02 pm
Clean up that clay and make it smooth, otherwise it will be a bugger to align, as Paulson said.
You really need to build up the clay and follow the line of the ears as your part in the mould. A smooth line (hopefully at 90degrees) to the side of your object to be cast will stop the silicone from getting under the original, which would need to be cleaned-up prior to pouring the second part of the mould.
I just use a slightly rounded end of a pencil pushed into the clay to make the keys.
- blind pig
- Junkie
- Posts: 581
- Joined: Fri Feb 19, 2010 2:41 am
- Location: Brisbane Australia
Re: New Addicts here for treatment
![]() by NebuK » Sat Mar 31, 2012 5:49 pm
by NebuK » Sat Mar 31, 2012 5:49 pm
Heyyas,
sup, updated my mold design I've tried to implement all the tips you've given me here. Thank you so much!~
Again, i've put images to
http://pics.kanojo.de/resin_casting/ (IMG_2711 and following)
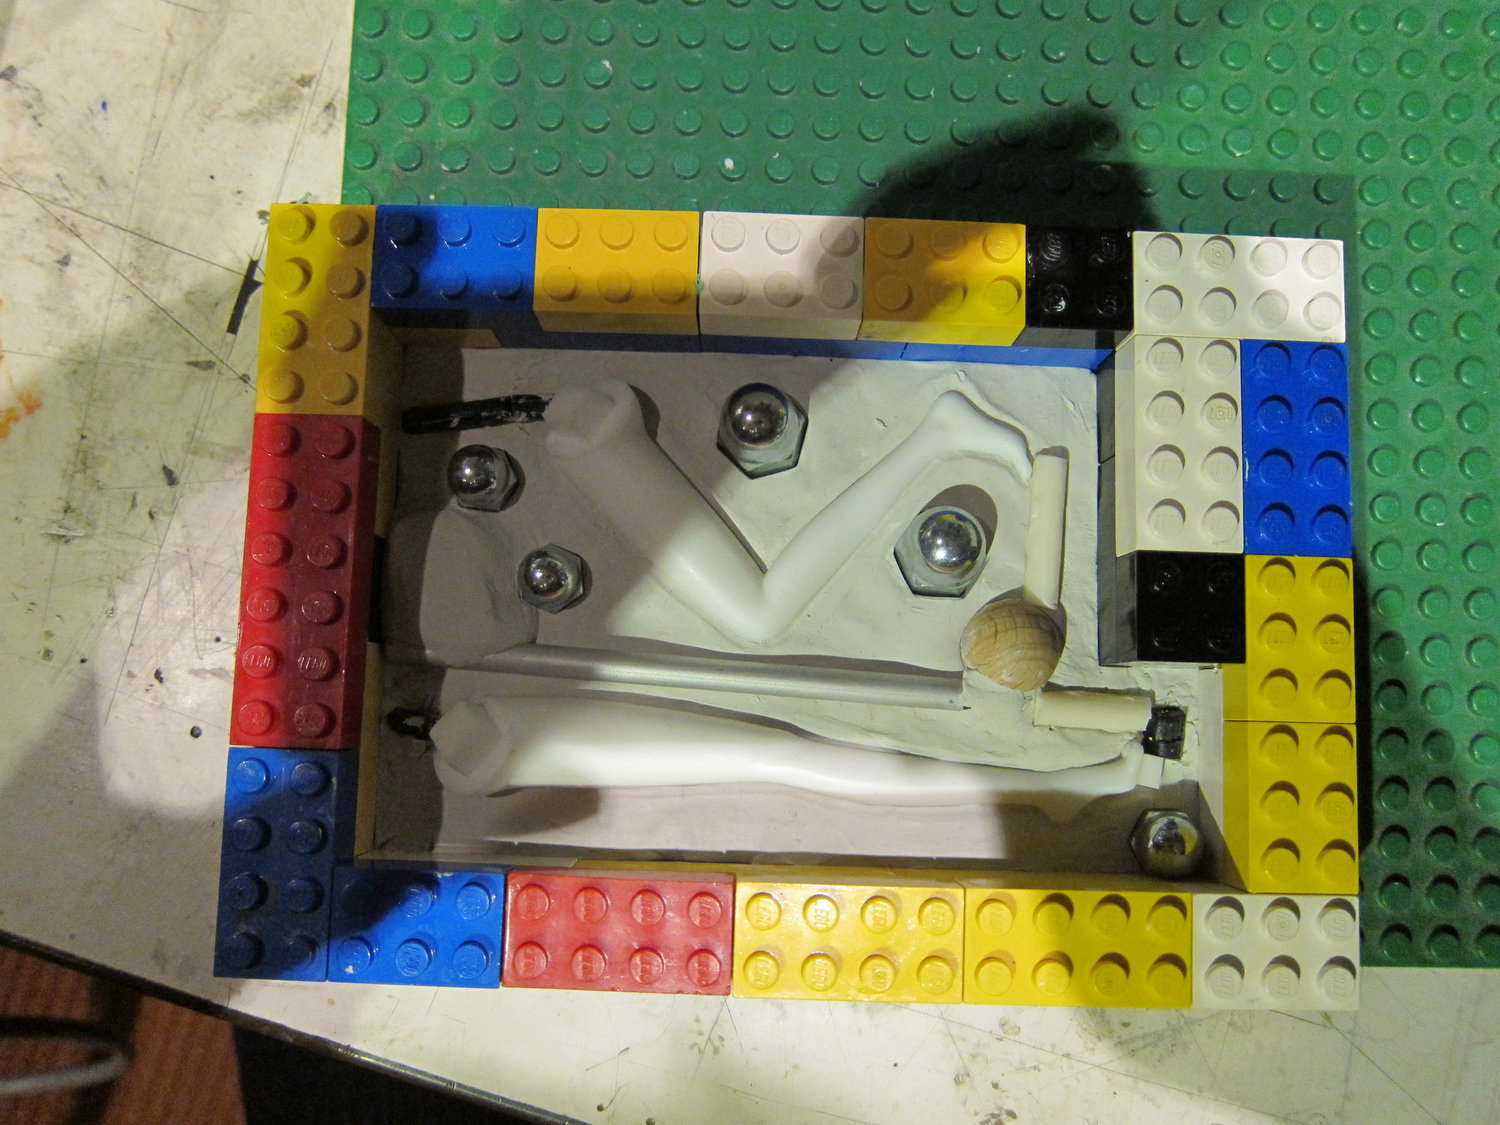
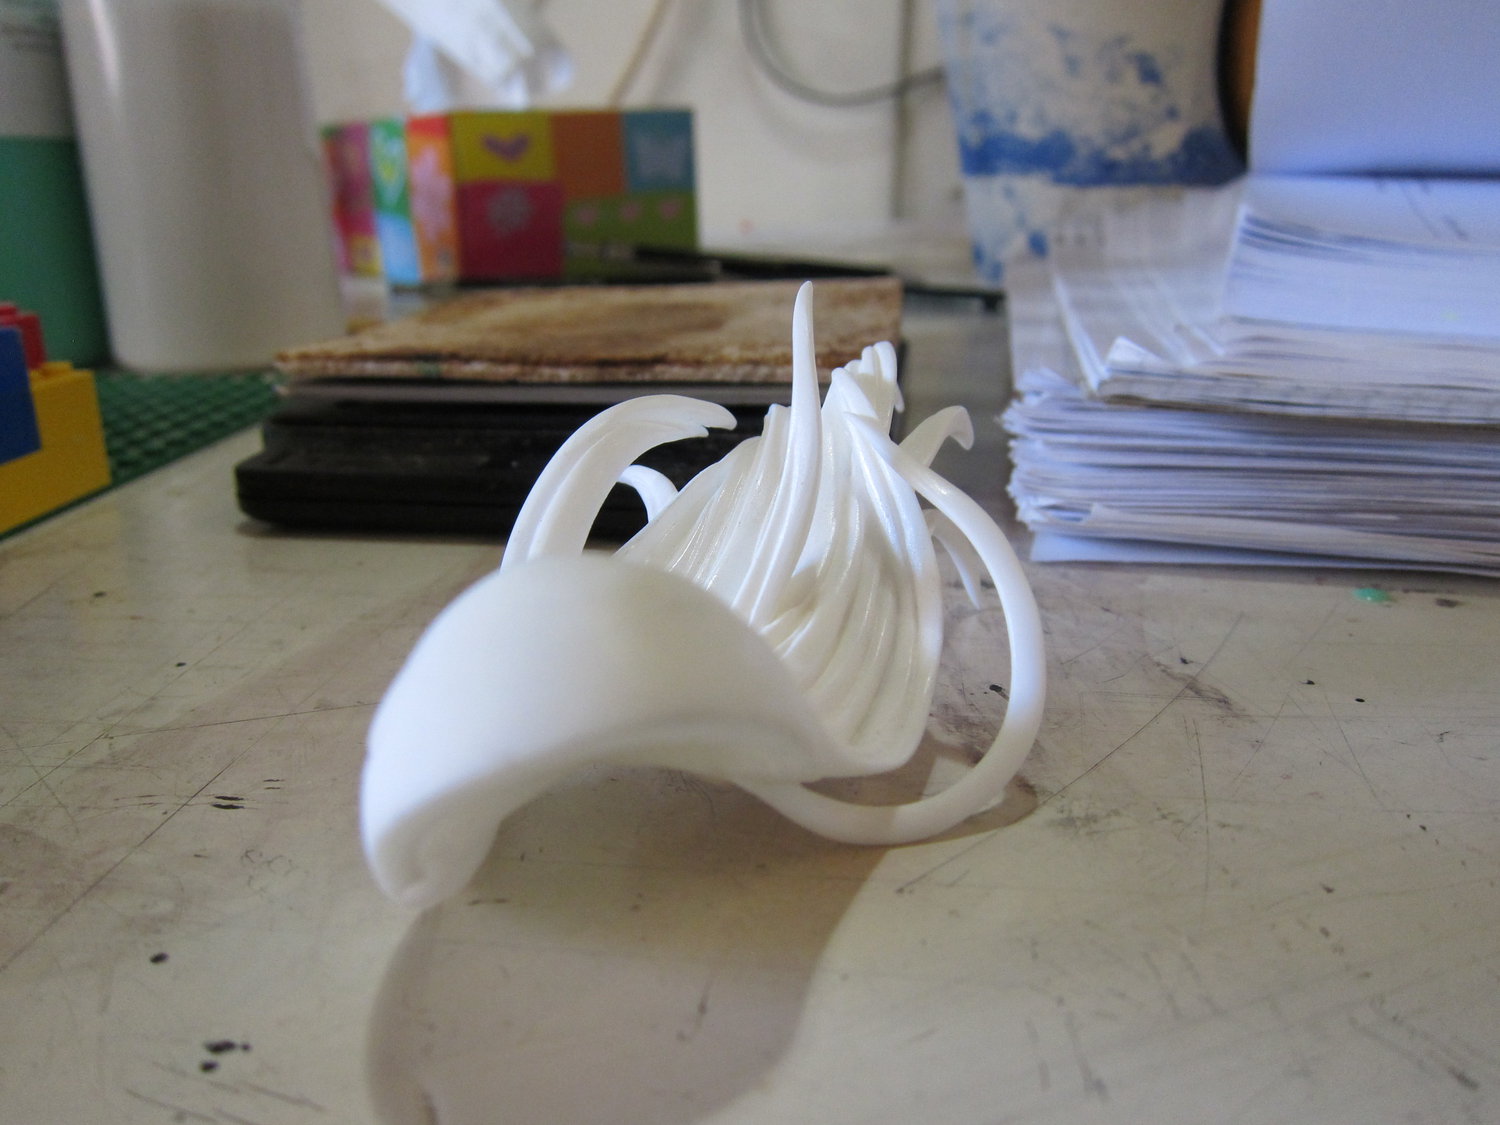
I'm once again sticking to the hexnuts and the basin ... even though none of you seem to know the basin i've got the tip from what seemed to me a experienced caster. I've once again made the thick pouring channel of a drinking straw (this time ends closed ;P thanks). I've also found myself a few old plastic sticks for the smaller channels ... less problems with pushing them in the clay. As for the air "pockets" around the ears ... i do understand the problem, however i don't really know wheter i should really do it. I'd prefer no marks and parts i need to clip off around the ears since they're really really small and delicate.
I've also tried to push a very smooth line against the pieces. I've smeared it against the pieces until i felt sure enough its cleanly closed, then started to push it down with a ... ugh, vocab missing ... micro spatula? Top one in this image: http://tinyurl.com/c692d7p to make a seam-line as orthogonal as possible.
I've also tried to make the rest of the clay smoother (as smooth as i could without destroying the clean clay seamline around the objects).
Thanks for all the tips - the one with the rolls?(sausages?) of clay is also nice ... i think i'll try to make some chutes at the topend of the channels like this.
Also, i've tried a bit thinking like a air bubble and then turned the panty around ... a few bubbles at the top ain't that bad, so i've turned it that way, set the air release at the top and the pouring channel at the bottom... or is that bad because of some other reason i haven't thought of?
What do you think of my new design? Better? Again no good? Too small (i reckon theres not much free space from masterpieces<--->end_of_mould)?
Thank you all! Regards
- NebuK
sup, updated my mold design
Again, i've put images to
http://pics.kanojo.de/resin_casting/ (IMG_2711 and following)
I'm once again sticking to the hexnuts and the basin ... even though none of you seem to know the basin i've got the tip from what seemed to me a experienced caster. I've once again made the thick pouring channel of a drinking straw (this time ends closed ;P thanks). I've also found myself a few old plastic sticks for the smaller channels ... less problems with pushing them in the clay. As for the air "pockets" around the ears ... i do understand the problem, however i don't really know wheter i should really do it. I'd prefer no marks and parts i need to clip off around the ears since they're really really small and delicate.
I've also tried to push a very smooth line against the pieces. I've smeared it against the pieces until i felt sure enough its cleanly closed, then started to push it down with a ... ugh, vocab missing ... micro spatula? Top one in this image: http://tinyurl.com/c692d7p to make a seam-line as orthogonal as possible.
I've also tried to make the rest of the clay smoother (as smooth as i could without destroying the clean clay seamline around the objects).
Thanks for all the tips - the one with the rolls?(sausages?) of clay is also nice ... i think i'll try to make some chutes at the topend of the channels like this.
Also, i've tried a bit thinking like a air bubble and then turned the panty around ... a few bubbles at the top ain't that bad, so i've turned it that way, set the air release at the top and the pouring channel at the bottom... or is that bad because of some other reason i haven't thought of?
What do you think of my new design? Better? Again no good? Too small (i reckon theres not much free space from masterpieces<--->end_of_mould)?
Thank you all!
- NebuK
- NebuK
- Casual
- Posts: 17
- Joined: Tue Mar 20, 2012 7:41 am
Re: New Addicts here for treatment
![]() by blind pig » Sat Mar 31, 2012 6:26 pm
by blind pig » Sat Mar 31, 2012 6:26 pm
The clay around the jaw-line and left ear needs to be cleaned up and smoothed. You don't want those little feathers of clay on your original, as they will end up on your final resin piece.
I'd put some clay around the joins to make a better attachment between your straw channels and the objects to be cast, as you might get a slow flow of resin or air bubbles sticking there.
Bloody good first effort so far though!
I'd put some clay around the joins to make a better attachment between your straw channels and the objects to be cast, as you might get a slow flow of resin or air bubbles sticking there.
Bloody good first effort so far though!
- blind pig
- Junkie
- Posts: 581
- Joined: Fri Feb 19, 2010 2:41 am
- Location: Brisbane Australia
Re: New Addicts here for treatment
![]() by mangozac » Sun Apr 01, 2012 12:43 pm
by mangozac » Sun Apr 01, 2012 12:43 pm
Oh yeah I can make that....
-
mangozac - Resin Addict Collaborator
- Posts: 4271
- Joined: Fri Oct 16, 2009 3:40 pm
- Location: QLD, Australia
Re: New Addicts here for treatment
![]() by NebuK » Sun Apr 01, 2012 5:47 pm
by NebuK » Sun Apr 01, 2012 5:47 pm
Hey,
thanks again for the tips - both of you!
Sadly i must admit that yesterday i couldn't stand it anymore - i've cleaned the front faces of the pieces very very good (i hope!) and poured. I'll upload some photos again later.
Also you're right, the panty has no problems with bubbles at the top... so i thought that if i didn't rotate it that gave me two things: The sides (especially the right side) - which do matter - may get to be a little less likely a spot for bubbles, and second, maybe i can see just how bad the bubble thing will get. I'm doing (almost) everything to avoid them here, but i'd really like to see how hard i need to try ;P.
The channel size ... uhhh, what i did really does sound bad there. Now that you mention it i just realized that all the tutorials, videos, images, etc. i've looked at are for those warhammer miniature figures ... and they used rods of similar diameter. But heck, they're MUCH SMALLER. D**n! I really hope it will still work. But ... uh, say, isn't cutting the channels a bit wider a option? Or am i likely to fail horribly and destroy my mould? :>
Aaaaand, because a newbie never runs out of questions, here's my last two: I'll be cleaning the rest of the clay off soon, i've managed to get the majority of the clay off without lifting the master pieces out of the mold, but some clay sticks really trickily at the edges. I've read that some people do lift the master pieces out of the part-a-mould for cleaning, whereas others write things along the lines of "GAARGH! NEVER lift them out! and if you do god kills a kitty and you must place it in there with great care and waste hours of your life praying for that lost kitten!"... i could see that both have a point: Alinging the piece in the mould again should be easy if the mould's good, right? On the other hand, a little imperfection will always be there once its lifted. So my question here: How bad will it be if i lift it and place it carefully?
The last one (for real!) would be: As a beginner in this i would *love* a thread that could maybe have the title "Mouldmaking by reference". If there was a nice little template for a form where people could upload, maybe a image of their parts, a image of their mould, and a quick comment how it turned out, why, and what they would do differently next time, this would help beginners greatly! It seems to me that moldmaking is more of a art than "science" (as in: you need experience, experience and nothing but experience, you can deduce it logically to a degree, but you will always overlook and forget something important a experienced moulder would've done). Maybe it'd even be interesting of more advanced casters to see ... what would you think of something like that?
Thank you so much again ;P. Regards
- NebuK
*EDIT: Ps: Just poured second half ... *shiver*, i hope it'll turn out ok! I've tried to "thicken" the channels a bit using clay after you pointed me to it. I also hope the channels will not start to float, they looked a bit loose. I've tried the molten-vaseline-around-the-part-a-mould trick *without* getting any vaselin on the master pieces. Then a fair amout of release agent, then pour ... uhhhh, i'm so excited.
- NebuK
- Casual
- Posts: 17
- Joined: Tue Mar 20, 2012 7:41 am
Re: New Addicts here for treatment
![]() by mangozac » Sun Apr 01, 2012 9:25 pm
by mangozac » Sun Apr 01, 2012 9:25 pm
Oh yeah I can make that....
-
mangozac - Resin Addict Collaborator
- Posts: 4271
- Joined: Fri Oct 16, 2009 3:40 pm
- Location: QLD, Australia
Re: New Addicts here for treatment
![]() by NebuK » Mon Apr 02, 2012 7:58 am
by NebuK » Mon Apr 02, 2012 7:58 am
Reporting back from the front, oh seargants of castin!
I've just demoulded my first cast, and i must say it is quite a success for me! Thanks to you all for your great help to make this possible for me! Thank you SO much!
Pix on: http://pics.kanojo.de/resin_casting/ (it's got a second page now... ;P)
I've had a few problems in the process though. The photos do reflect some. After i had clayed everything up and poured the first part of silicone i cleaned everything, thereafter smeared the non-piece-parts of the silicone with warm/hot vaseline, sprayed a layer (thin? probably...) of my release agent and the poured the second half. Seperating the two halves ... u nearly started crying. It was so hard! Sometimes i had the feeling that the silicone would tear (fortuneatly it didn't!). Here the question would be what i did wrong ...? More vaseline? More release Agent? Placing magic glowing unicorn barfing rainbows next room?
Next i took out the parts, cleaned the molds as good as i could, cut a few channels a little wider, sprayed them with release agent again, dusted them with a soft brush with talcum powder, blew away the excess talkum. I've placed the molds between two sheets of thin wood to get the rubber bands to apply pressure more evenly. Mixed the resin and poured slowly until i saw it coming out the air vents. Then i poured a bit more from a little higher to press out some eventually floating bubbles through the air vent, placed on the vibration table, vibrated for 2-3 minutes (after that the drops on the top were hardening already...) and ran away (eww, stink!).
The parts are quite nice as far as i can see. The panty really did accumulate a little bubble at the top, but thats of no concern. More importantly, the head is perfect! Even the ears with their tiny detail came out without problems (and bubbles)! Woah, i'm really happy!
I also noticed that the "basin" really did collect bubbles ... to form a big one. I'm not sure whether to count this as a success ... but does anyone see a reason not to keep using that technique?
Back to the organizational ... I think i'm going to look for a reliable, long-term-saving and trustworthy image hoster tomorrow (don't want the images of the first posts to disappear after a year or so, don't we?) and start that "moldmaking by reference" thread now that someone of the "old stager" (hope this isn't a expression that sounds negative, in german it doesn't!) approved of it. Looking so forward to seeing all of your works.
Thank you so much again! And ... as advance-warning: I think i'm going to need a little more help laying out molds in the future ... the hard parts of my project are still to come
Thanks ;P Regards
- NebuK
PS: One last thing ... is there something that i can do to "take care" of the molds? I'd like them to last as long as possible ... Is there something i can do to "refresh" the softener or whatever the resin "sucks out" the silicone? Also, is there some known possibility to "store" molds for longer time? I've read that its mold->use molds a couple'a times->wait 1/2 year->discard molds. If there's something, however elaborate, to keep them alive for maybe a year or two ... well, if there's something like that, could you point me to a good reading about it?
I've just demoulded my first cast, and i must say it is quite a success for me! Thanks to you all for your great help to make this possible for me! Thank you SO much!
Pix on: http://pics.kanojo.de/resin_casting/ (it's got a second page now... ;P)
I've had a few problems in the process though. The photos do reflect some. After i had clayed everything up and poured the first part of silicone i cleaned everything, thereafter smeared the non-piece-parts of the silicone with warm/hot vaseline, sprayed a layer (thin? probably...) of my release agent and the poured the second half. Seperating the two halves ... u nearly started crying. It was so hard! Sometimes i had the feeling that the silicone would tear (fortuneatly it didn't!). Here the question would be what i did wrong ...? More vaseline? More release Agent? Placing magic glowing unicorn barfing rainbows next room?
Next i took out the parts, cleaned the molds as good as i could, cut a few channels a little wider, sprayed them with release agent again, dusted them with a soft brush with talcum powder, blew away the excess talkum. I've placed the molds between two sheets of thin wood to get the rubber bands to apply pressure more evenly. Mixed the resin and poured slowly until i saw it coming out the air vents. Then i poured a bit more from a little higher to press out some eventually floating bubbles through the air vent, placed on the vibration table, vibrated for 2-3 minutes (after that the drops on the top were hardening already...) and ran away (eww, stink!).
The parts are quite nice as far as i can see. The panty really did accumulate a little bubble at the top, but thats of no concern. More importantly, the head is perfect! Even the ears with their tiny detail came out without problems (and bubbles)! Woah, i'm really happy!
I also noticed that the "basin" really did collect bubbles ... to form a big one. I'm not sure whether to count this as a success ... but does anyone see a reason not to keep using that technique?
Back to the organizational ... I think i'm going to look for a reliable, long-term-saving and trustworthy image hoster tomorrow (don't want the images of the first posts to disappear after a year or so, don't we?) and start that "moldmaking by reference" thread now that someone of the "old stager" (hope this isn't a expression that sounds negative, in german it doesn't!) approved of it. Looking so forward to seeing all of your works
Thank you so much again! And ... as advance-warning: I think i'm going to need a little more help laying out molds in the future ... the hard parts of my project are still to come
Thanks ;P Regards
- NebuK
PS: One last thing ... is there something that i can do to "take care" of the molds? I'd like them to last as long as possible ... Is there something i can do to "refresh" the softener or whatever the resin "sucks out" the silicone? Also, is there some known possibility to "store" molds for longer time? I've read that its mold->use molds a couple'a times->wait 1/2 year->discard molds. If there's something, however elaborate, to keep them alive for maybe a year or two ... well, if there's something like that, could you point me to a good reading about it?
- NebuK
- Casual
- Posts: 17
- Joined: Tue Mar 20, 2012 7:41 am
Re: New Addicts here for treatment
![]() by mangozac » Mon Apr 02, 2012 7:40 pm
by mangozac » Mon Apr 02, 2012 7:40 pm
Oh yeah I can make that....
-
mangozac - Resin Addict Collaborator
- Posts: 4271
- Joined: Fri Oct 16, 2009 3:40 pm
- Location: QLD, Australia
Re: New Addicts here for treatment
![]() by NebuK » Wed Apr 04, 2012 6:03 am
by NebuK » Wed Apr 04, 2012 6:03 am
Hey,
thanks for the reading on preserving the moulds! I'm currently asking a chemist about which of the myriads of silicone oils are the ones most suited...
Also, i've got a problem: I've just made a first cast from my 2nd mould (the legs of my figure...), and it's turned out ... not as good as the first one. I has a massive "overcast", almost all of the mold is coated with a thin resin layer. The seamlines at the parts are likewise - horrible! Bubblewise its okay again, one small bubble in a crucial part, but nothing thats not fixable. Well ... about the thin resin layer thats everywhere: I'm a little at a loss on where to start looking. One idea would be that i've used too few rubberbands to hold the mold together (i'm clamping the mold between two sheets of wood, then sling the rubber bands around) - i've used as many as with my first mold, which is significantly smaller ... could that be my cause? On the other hand, i've tried a higher vibration frequency with less amplitude this time. Likely culprit? I somehow don't think so, but what do you think?
Or did i do something wrong when making the mold?
I'm going to post some pictures later ... so until then - thanks again, and best regards
- NebuK
- NebuK
- Casual
- Posts: 17
- Joined: Tue Mar 20, 2012 7:41 am
Re: New Addicts here for treatment
![]() by mangozac » Wed Apr 04, 2012 7:28 am
by mangozac » Wed Apr 04, 2012 7:28 am
Just sounds like not enough clamping pressure. Fit some bigger rubber bands and it should be sorted 
You want to get the camping pressure to the point just before you can see it bowing out the silicone at the sides of the mould.
You want to get the camping pressure to the point just before you can see it bowing out the silicone at the sides of the mould.
Oh yeah I can make that....
-
mangozac - Resin Addict Collaborator
- Posts: 4271
- Joined: Fri Oct 16, 2009 3:40 pm
- Location: QLD, Australia
Re: New Addicts here for treatment
![]() by NebuK » Fri Apr 06, 2012 4:33 am
by NebuK » Fri Apr 06, 2012 4:33 am
Hey,
i've tried again with a different clamping technique. This time i've clamped the silicone between wood, added a length of square timber in the middle of the wood, and then clamped. This was to be able to increase the clamping pressure while still maintaining a straight clamp without the silicone deform all too much... Anyways, the clamping pressure was quite high this time.
I got a little less flash this time, but not enough. The seamlines are a hell! While i have only little problems with bubbles (and due to own faults - i haven't added airvents at the toes, but i wouldn't have known how to do so without damaging the parts themselves!). So anyways, i've once again got a few beginner questions ... i'll probably get on your nerves, so please bear with me ;P.
Again i've put everything on http://pics.kanojo.de/resin_casting/
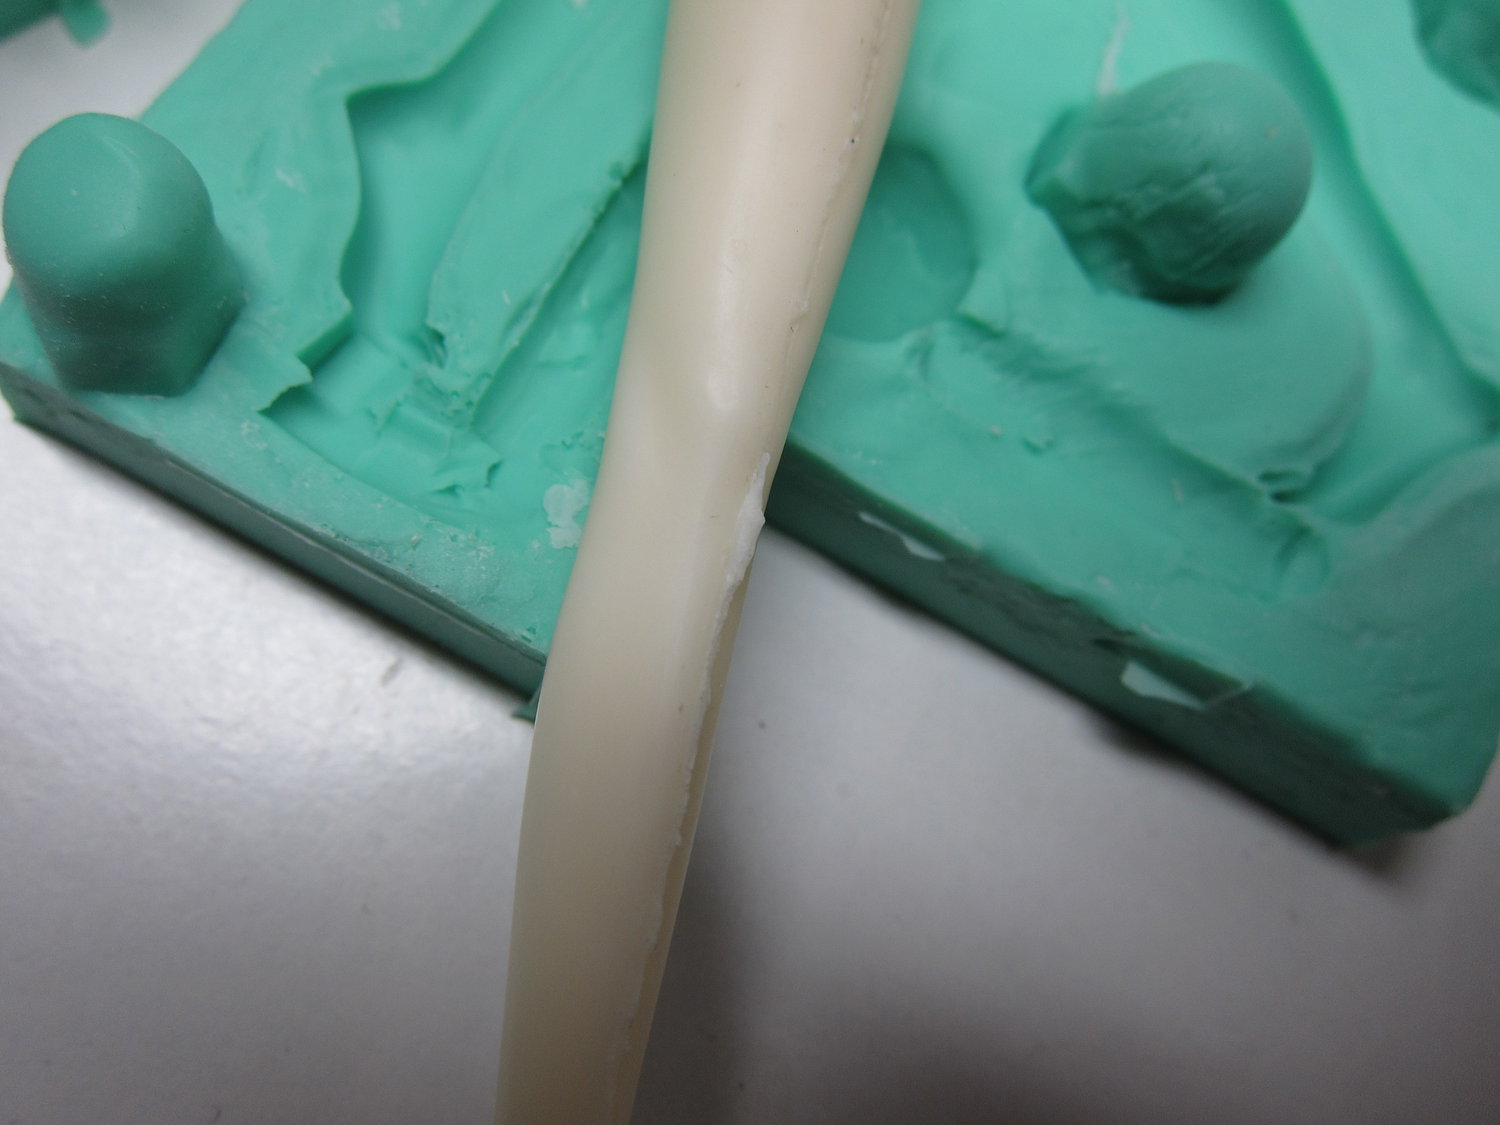
First is about flashes you can see on the images http://pics.kanojo.de/resin_casting/IMG_2837.JPG and http://pics.kanojo.de/resin_casting/IMG_2838.JPG . I really wonder why they are so huuuuge! I was really careful when cleaning the clay off the parts after i've poured part-a silicone and i certainly didn't take them out! So ... what else could've gone wrong? Maybe i should cease using the shaker table? The parts were molded like this:
http://pics.kanojo.de/resin_casting/IMG_2816.JPG
Please see the other images on how i pressed down the clay, cleaned it, etc.. I though i did everything right!
The other is about the mini marks i've got at the one part of the leg/foot, seen on image
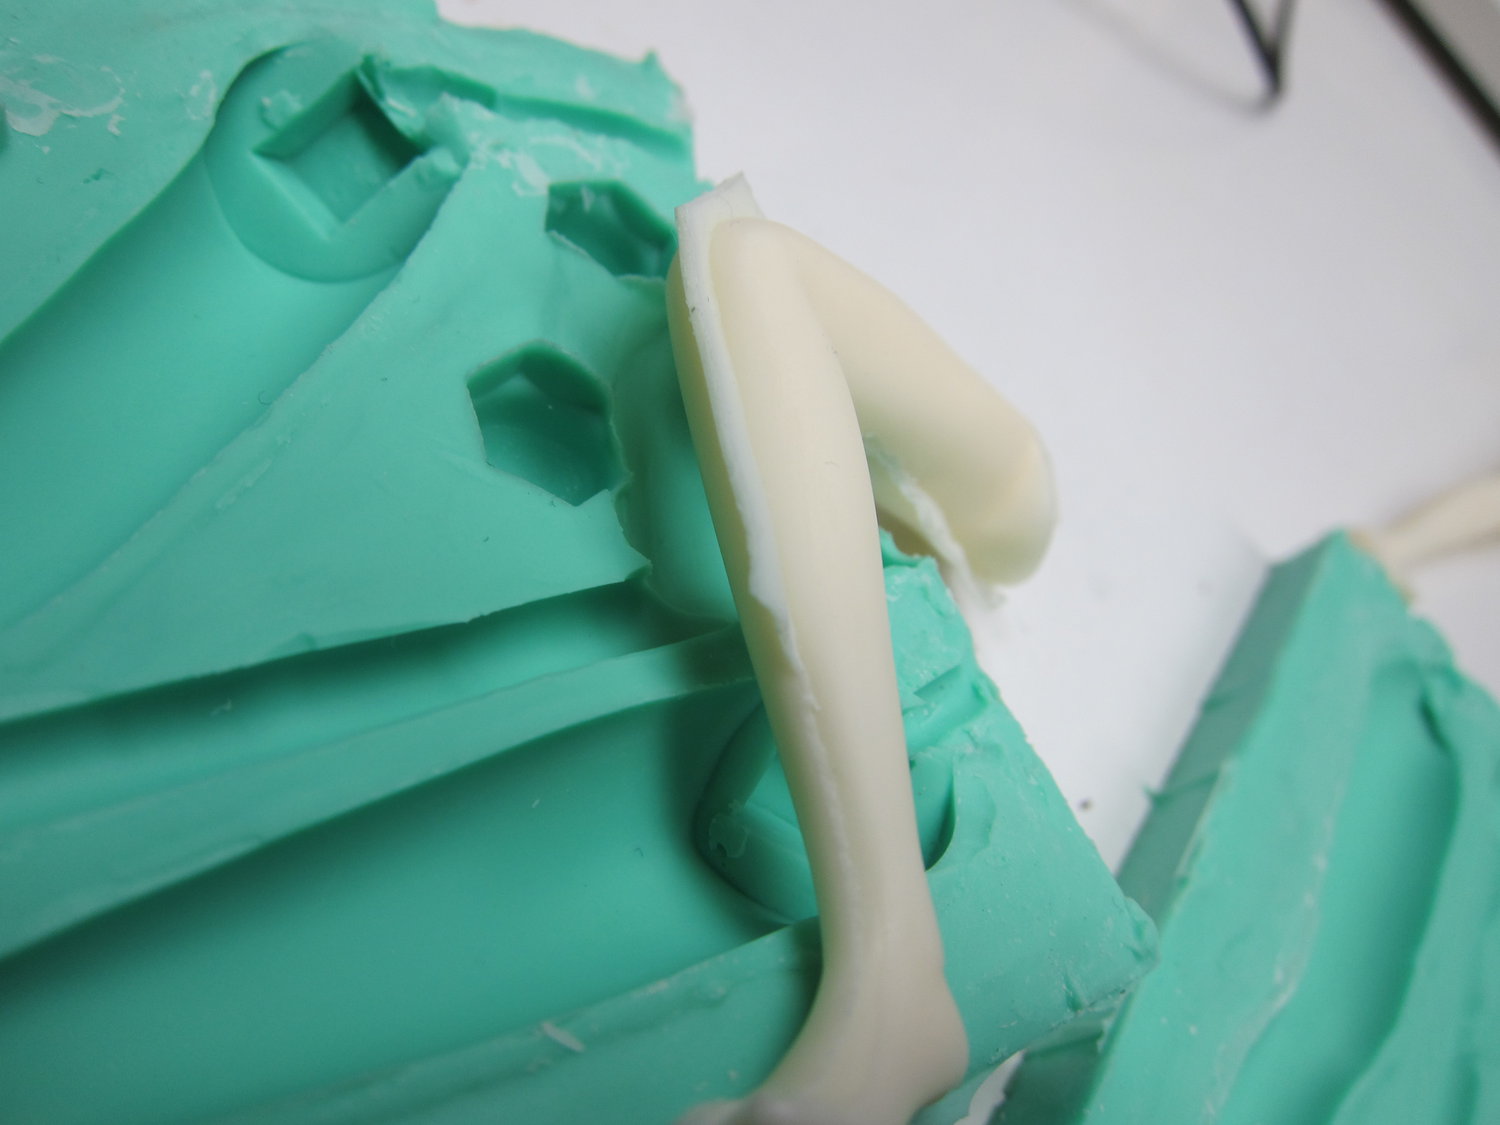
http://pics.kanojo.de/resin_casting/IMG_2835.JPG . This looks to me as if some silicone from the part-b pour went under the masterpiece (which was submerged in part-a silicone). Again, if i cleaned the clay really really careful, how does this happen? What can i do to make sure this doesn't happen again?
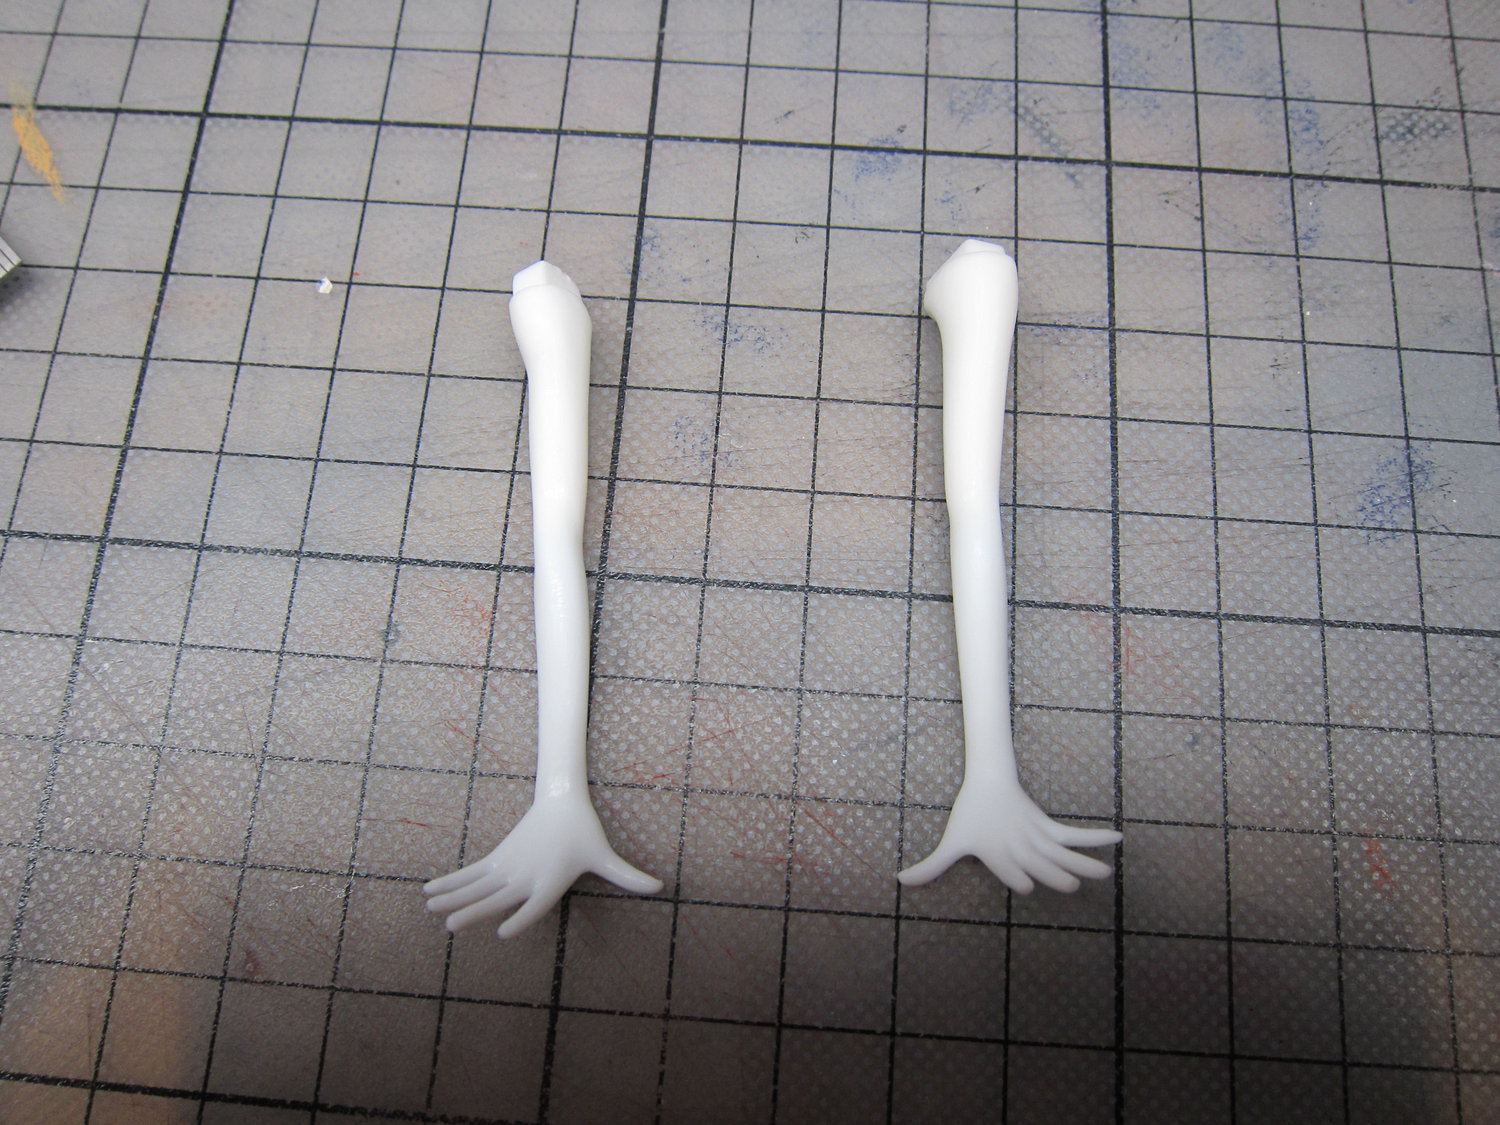
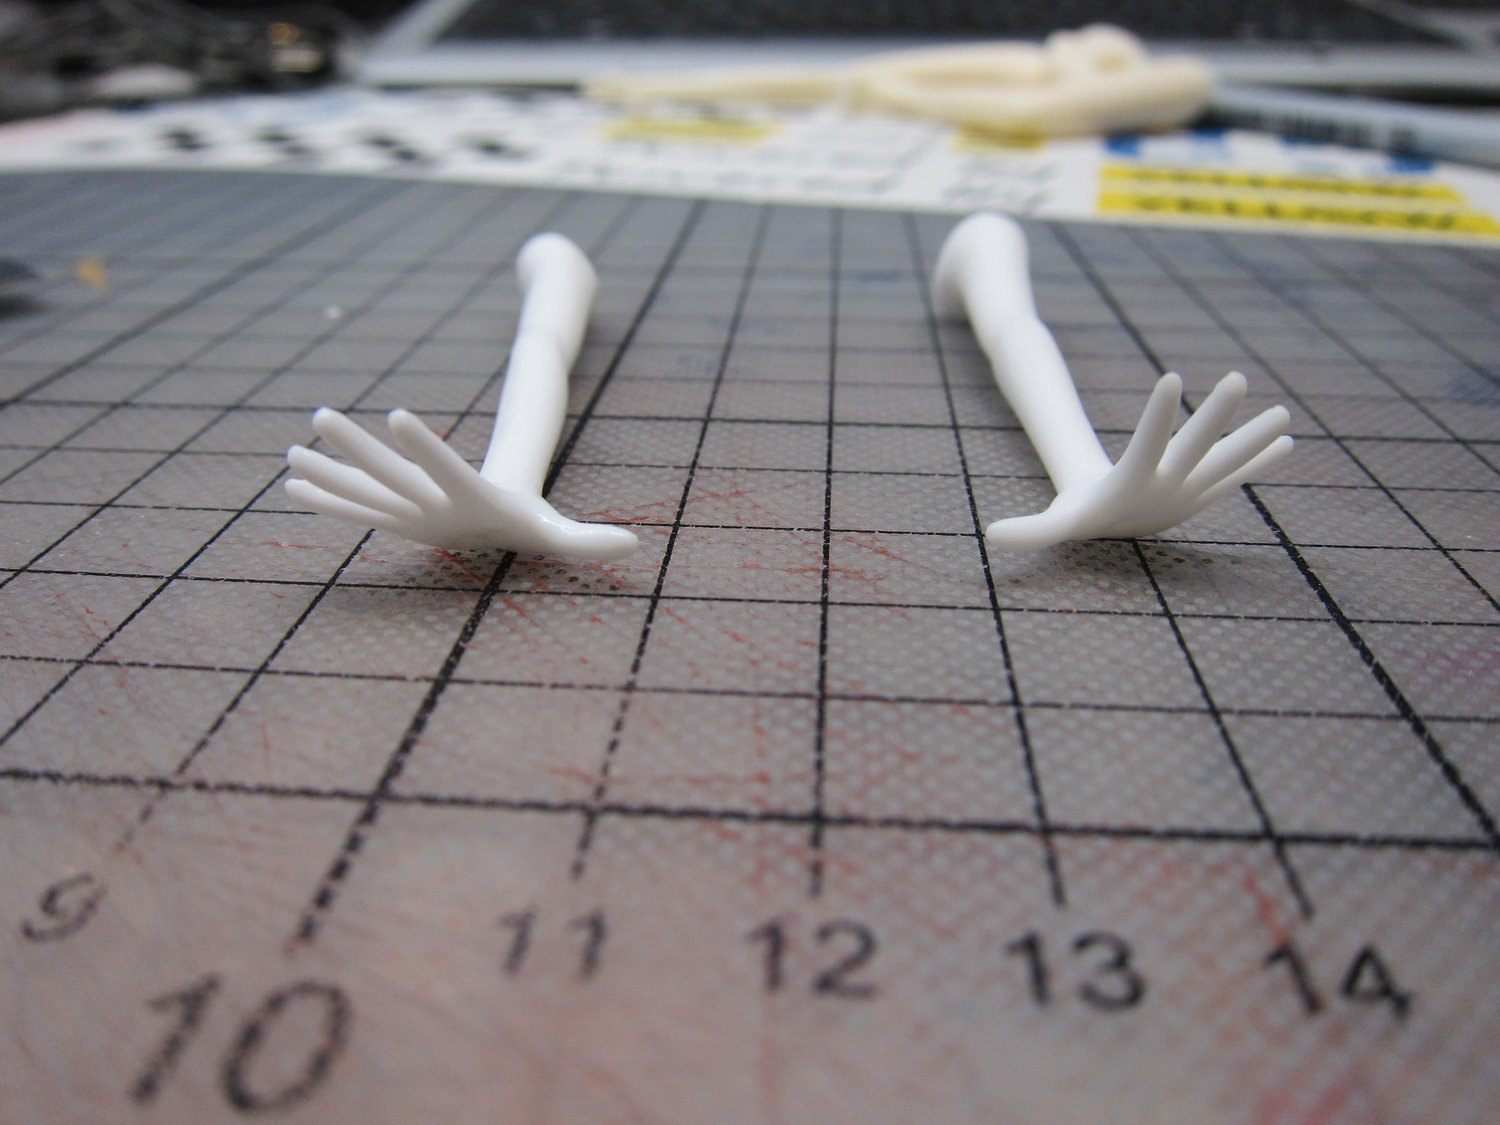
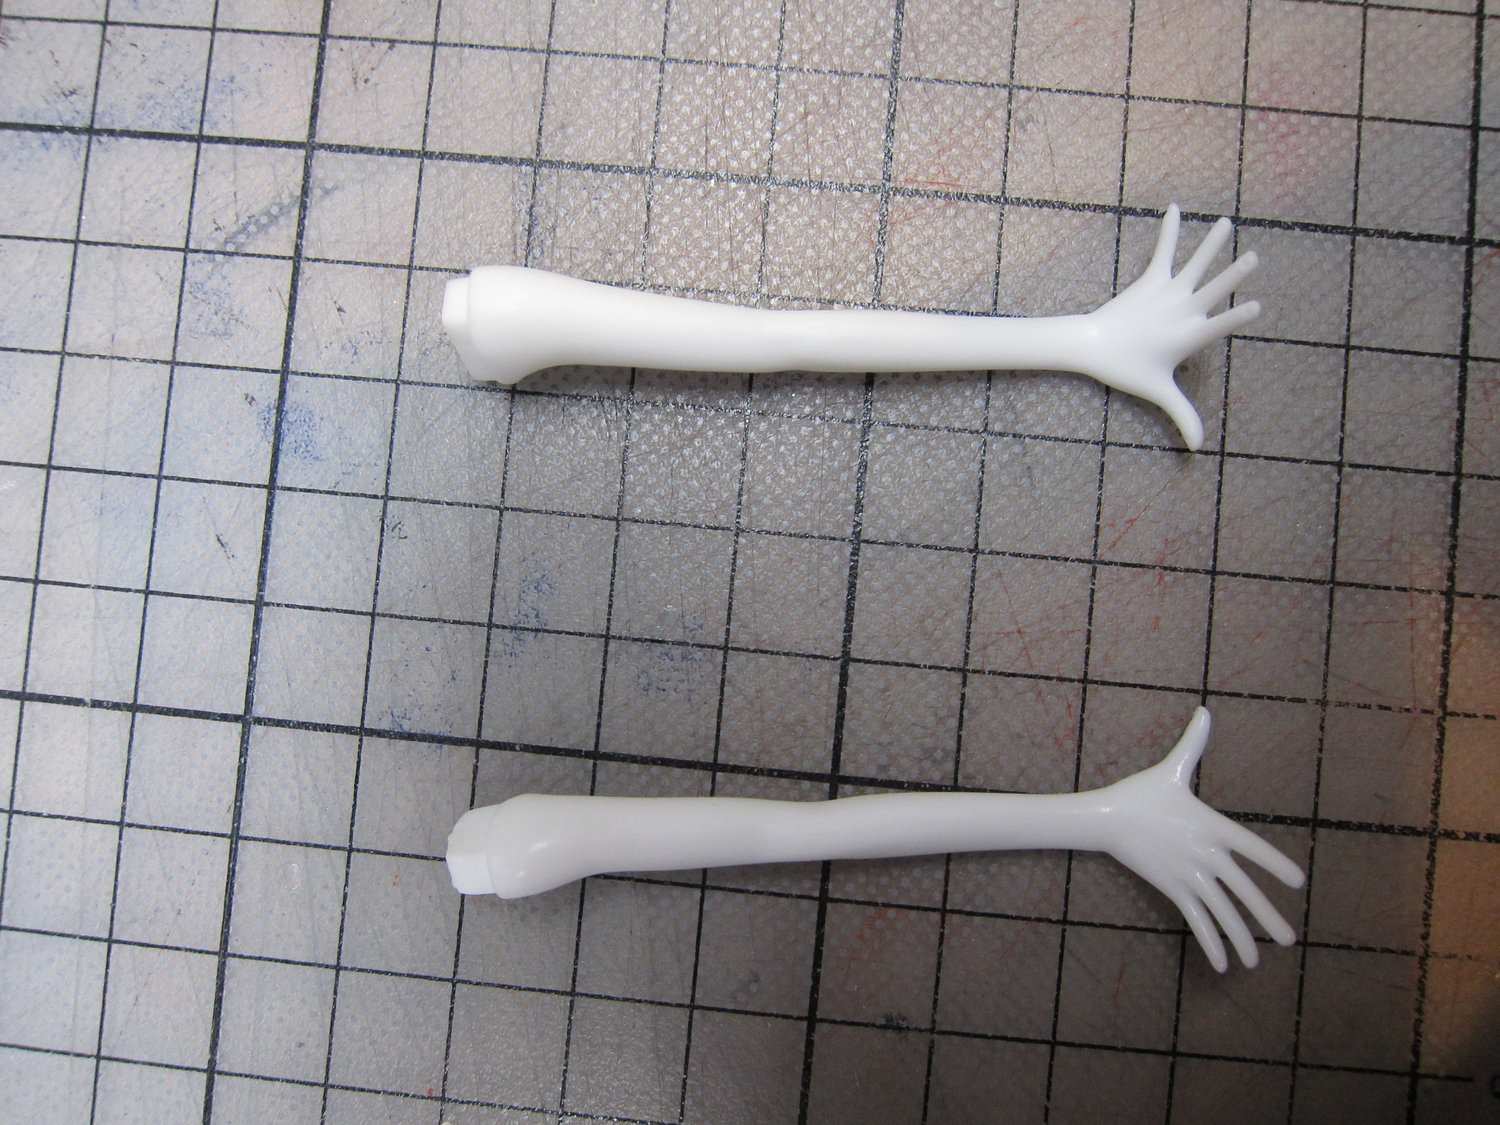
The other is about the next part i'm going to try to mould, the two arms ( http://pics.kanojo.de/resin_casting/IMG_2832.JPG http://pics.kanojo.de/resin_casting/IMG_2833.JPG http://pics.kanojo.de/resin_casting/IMG_2834.JPG ). I would've tried to lay them out as shown on the pic, side by side. The clay would be halfway up to the part, placing the seamlines at the fingertips where i can reach them well to sand them off. On the other hand, making the clay smooth and pressing it well on the part could be challenging between the fingers? Also i was planning to use the two connection blocks at the top of the arms to either pour or air-vent. But ... where would i best connect the other channel? Or, is only a pouring channel without a air vent a option for parts like these?
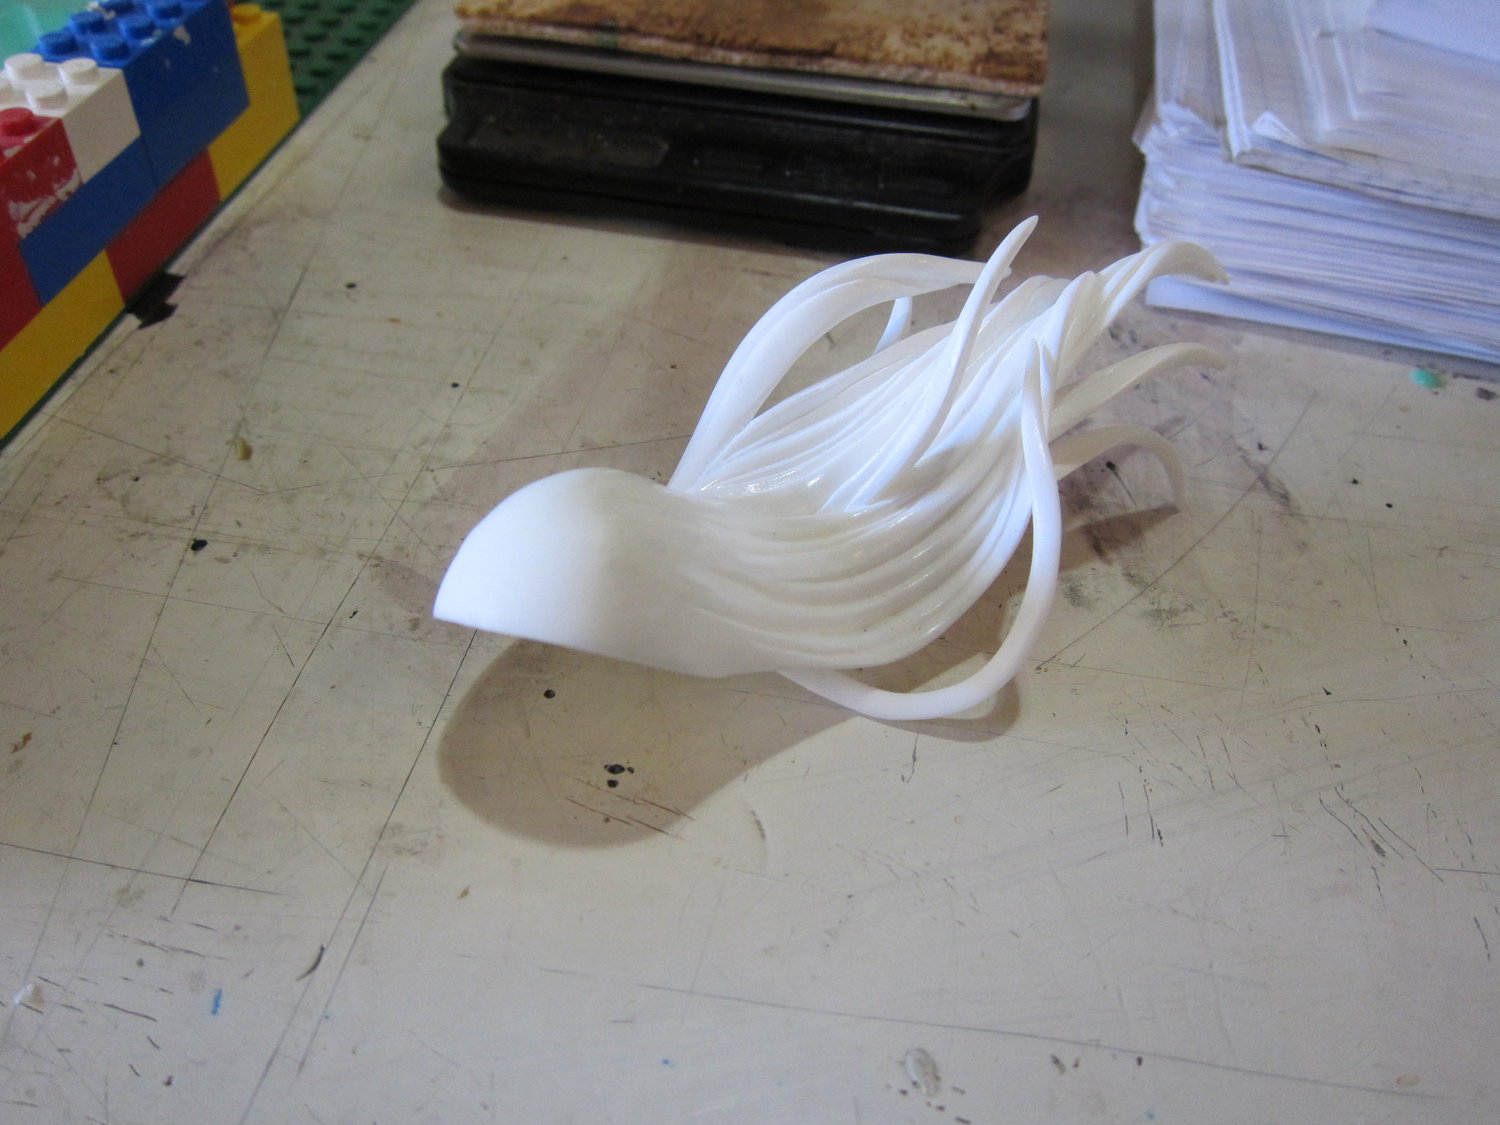
Aaaand the last question for beginners hell today would be a further outlook ... i'm going to need to mold and cast the HELL OF HAIRS pictured on
http://pics.kanojo.de/resin_casting/IMG_2824.JPG
http://pics.kanojo.de/resin_casting/IMG_2825.JPG
http://pics.kanojo.de/resin_casting/IMG_2826.JPG
http://pics.kanojo.de/resin_casting/IMG_2827.JPG
http://pics.kanojo.de/resin_casting/IMG_2828.JPG
http://pics.kanojo.de/resin_casting/IMG_2829.JPG
http://pics.kanojo.de/resin_casting/IMG_2830.JPG
after the arms and i have no friggin idea how to try to mould that! Please help me here :/, i'm TOTALLY lost.
Anyways, thank you alot for your great help till now! I'm really really greatful to all of you for how you've assisted me.
Best regards from Germany!
- NebuK
i've tried again with a different clamping technique. This time i've clamped the silicone between wood, added a length of square timber in the middle of the wood, and then clamped. This was to be able to increase the clamping pressure while still maintaining a straight clamp without the silicone deform all too much... Anyways, the clamping pressure was quite high this time
I got a little less flash this time, but not enough. The seamlines are a hell! While i have only little problems with bubbles (and due to own faults - i haven't added airvents at the toes, but i wouldn't have known how to do so without damaging the parts themselves!). So anyways, i've once again got a few beginner questions ... i'll probably get on your nerves, so please bear with me ;P.
Again i've put everything on http://pics.kanojo.de/resin_casting/
First is about flashes you can see on the images http://pics.kanojo.de/resin_casting/IMG_2837.JPG and http://pics.kanojo.de/resin_casting/IMG_2838.JPG . I really wonder why they are so huuuuge! I was really careful when cleaning the clay off the parts after i've poured part-a silicone and i certainly didn't take them out! So ... what else could've gone wrong? Maybe i should cease using the shaker table? The parts were molded like this:
http://pics.kanojo.de/resin_casting/IMG_2816.JPG
Please see the other images on how i pressed down the clay, cleaned it, etc.. I though i did everything right!
The other is about the mini marks i've got at the one part of the leg/foot, seen on image
http://pics.kanojo.de/resin_casting/IMG_2835.JPG . This looks to me as if some silicone from the part-b pour went under the masterpiece (which was submerged in part-a silicone). Again, if i cleaned the clay really really careful, how does this happen? What can i do to make sure this doesn't happen again?
The other is about the next part i'm going to try to mould, the two arms ( http://pics.kanojo.de/resin_casting/IMG_2832.JPG http://pics.kanojo.de/resin_casting/IMG_2833.JPG http://pics.kanojo.de/resin_casting/IMG_2834.JPG ). I would've tried to lay them out as shown on the pic, side by side. The clay would be halfway up to the part, placing the seamlines at the fingertips where i can reach them well to sand them off. On the other hand, making the clay smooth and pressing it well on the part could be challenging between the fingers? Also i was planning to use the two connection blocks at the top of the arms to either pour or air-vent. But ... where would i best connect the other channel? Or, is only a pouring channel without a air vent a option for parts like these?
Aaaand the last question for beginners hell today would be a further outlook ... i'm going to need to mold and cast the HELL OF HAIRS pictured on
http://pics.kanojo.de/resin_casting/IMG_2824.JPG
http://pics.kanojo.de/resin_casting/IMG_2825.JPG
http://pics.kanojo.de/resin_casting/IMG_2826.JPG
http://pics.kanojo.de/resin_casting/IMG_2827.JPG
http://pics.kanojo.de/resin_casting/IMG_2828.JPG
http://pics.kanojo.de/resin_casting/IMG_2829.JPG
http://pics.kanojo.de/resin_casting/IMG_2830.JPG
after the arms and i have no friggin idea how to try to mould that! Please help me here :/, i'm TOTALLY lost.
Anyways, thank you alot for your great help till now! I'm really really greatful to all of you for how you've assisted me
Best regards from Germany!
- NebuK
- NebuK
- Casual
- Posts: 17
- Joined: Tue Mar 20, 2012 7:41 am
Re: New Addicts here for treatment
![]() by NebuK » Fri Apr 06, 2012 8:38 am
by NebuK » Fri Apr 06, 2012 8:38 am
Heyyas,
i've got even worse news after trying to sand the parts (even the head and panty i've done first that turned out pretty good...). It seems that there are micro-bubbles (that i can't even photograph without getting my bellows for my dslr out, which i'm too tired to do right now) all over the place. And by all i mean ALL. Even though i've poured the resin in a thin stream, even directly next to the air vent at the top of the head, there are microbubbles. When having to sand a little more the surface would break through and the bubbles would be open, revealing a micro-structured very rough surface (due to all the open bubbles). Also: Yes, the bubbles are not directly on the surface, but a little beneath. Maybe .05mm or 0.2mm beneath... which is why i didn't notice them at first.
Is there a explaination for this? Is it my pouring technique? Is the resin i use (Sika G27, from trollfactory.de) simply bad? Heeeeeeelp~ I'm just seeing all the work i've put into this run getting flushed down the gutter ;/.
Thanks yet again, Regards
- NebuK
PS: I had another idea for pressure/vaccum casting: In germany we sometimes have what we call a "hauswasserwerk" (small in-house water supply). It looks roughly like this:
http://img.dooyoo.de/DE_DE/orig/1/6/1/3/4/1613419.jpg
As you can see it consists of a pump as well as a pressure pot. The pressure pot is usually sealed with a metal plate and using hexnuts. Also their typical max pressure rating is at around 8 bars. While they also usually include some kind of membrane or plastics bag to compensate for water expansion, this could be plainly ripped out and a small table or flat surface could be brought in. Then, when you're quick at screwing the hexnuts ... could this work for pressure casting? And/or vacuum molding?
Also, while i understand that a hand-pumped vacuum is nothing that could possible be a final solution, would shortly placing mixed resin under such a "light" vaccum help? As i said, i'd have access to such a device... dourgh, f... it, i could just try!
- NebuK
- Casual
- Posts: 17
- Joined: Tue Mar 20, 2012 7:41 am
33 posts
• Page 2 of 3 • 1, 2, 3
Who is online
Users browsing this forum: No registered users and 20 guests